One of the questions that keeps coming up recently is how to integrate GoToWebinar Simulated Live events with Marketo. Supposedly GoToWebinar added support for Marketo back in 2017, but Marketo hasn’t enabled this in the UI yet. So if you’re looking to run pre-recorded webinars as live GoToWebinar events and don’t want to manually register everyone or build out confirmation emails in Marketo, here’s a simple solution to push registrations from Marketo to GoToWebinar via webhook.
Keep in mind: you’ll still need to import your attendees/no shows back into Marketo manually post-event, but this will enable you to push registrations to GoToWebinar and utilize their confirmation emails without having to create your own in Marketo.
>> Related: 6 Ways to Handle Those Pesky Spambot Clicks in Marketo <<
How to Create a GoToWebinar Webhook in Marketo:
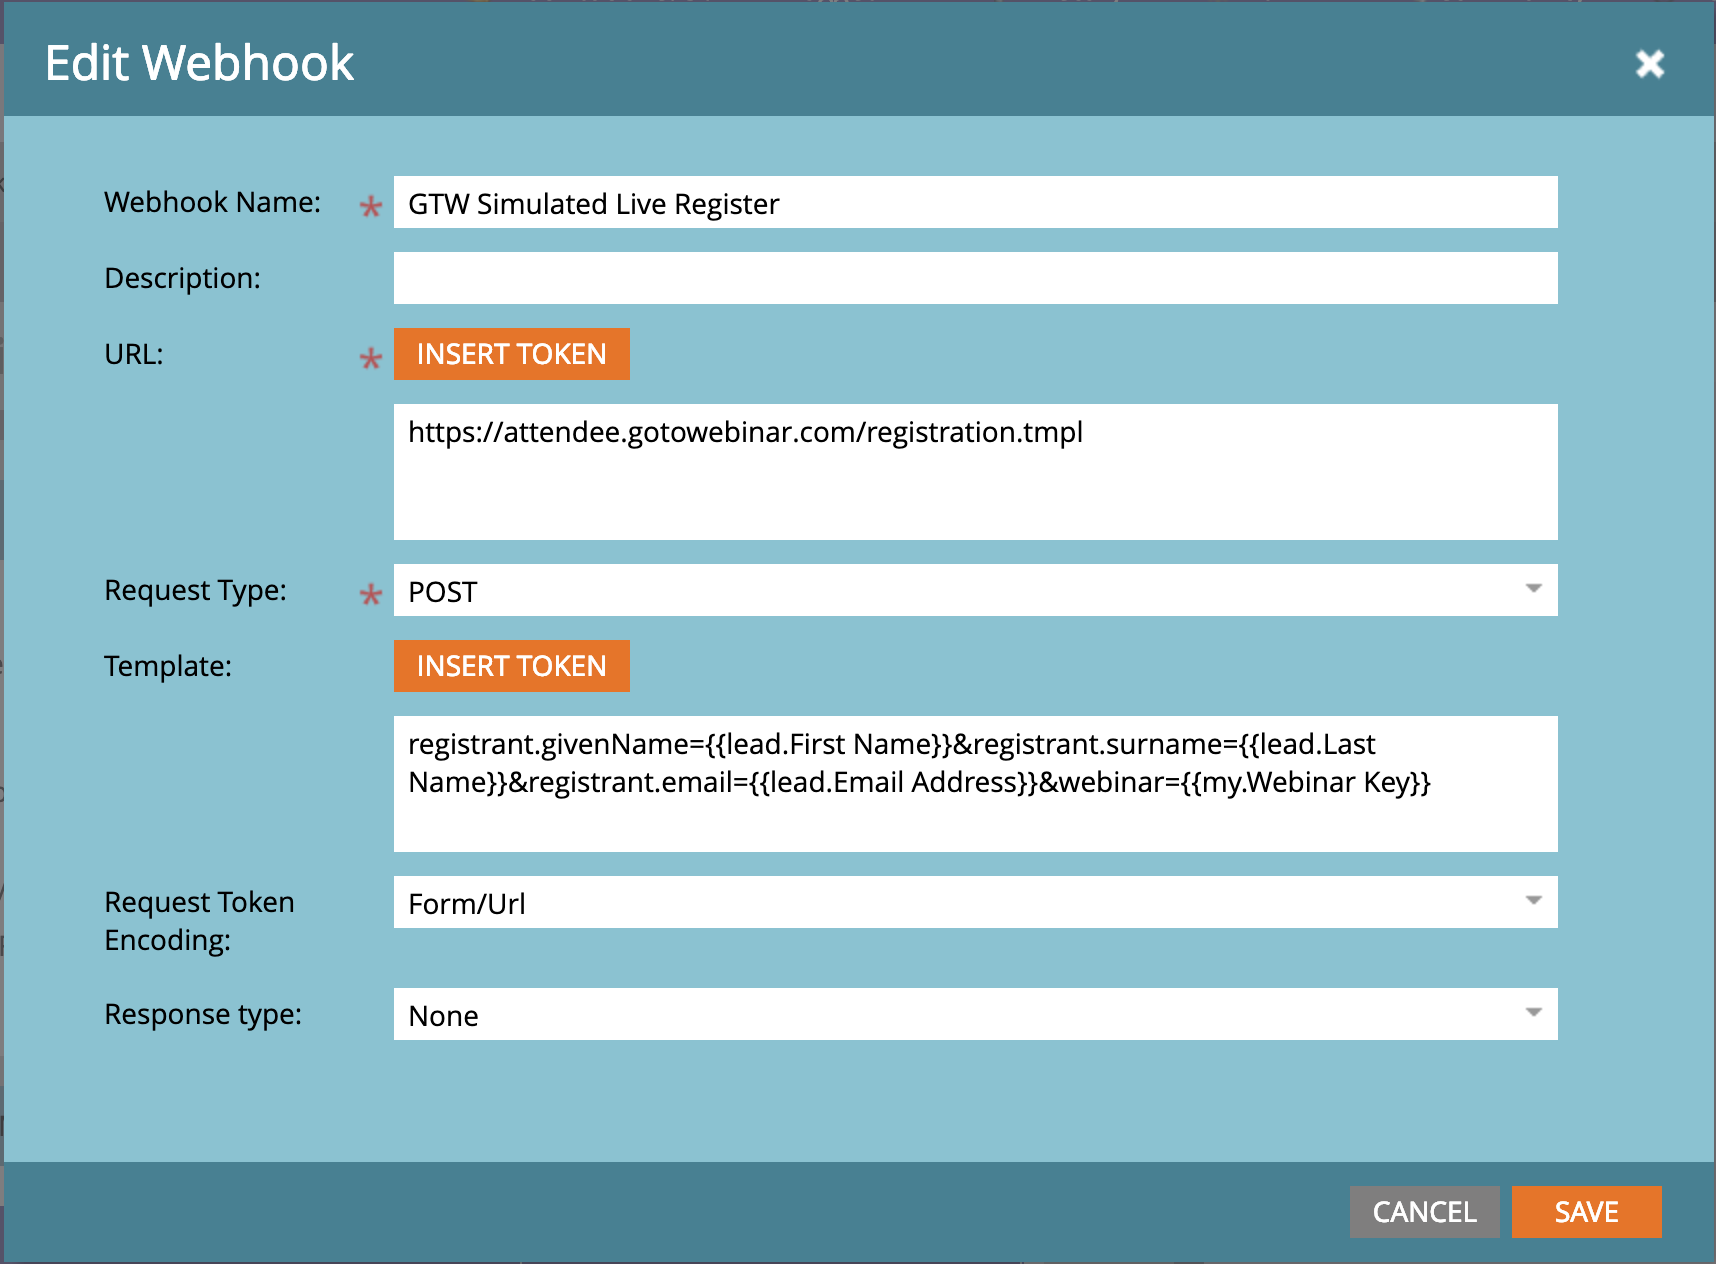
1. Create a webhook to push webinar registrations from Marketo to GoToWebinar (this will ONLY be used for Simulated Live events). In Marketo, go to the Admin area, scroll down on the left sidebar to Integration>Webhooks. Click New Webhook.
2. Give your webhook a name like GTW Simulated Live Register.
3. In the URL box, type in https://attendee.gotowebinar.com/registration.tmpl
4. In the Template box, type in the following:
registrant.givenName={{lead.First Name}}®istrant.surname={{lead.Last Name}}®istrant.email={{lead.Email Address}}&webinar={{my.Webinar Key}}
5. Select Form/Url from the Request Token Encoding dropdown.
6. Click Save. Your completed webhook should look like this:
Process Registrations for GoToWebinar Simulated Live Events in Marketo:
Once you’ve set up your webhook, you’re ready to process registrations for simulated live events within your Marketo programs. This requires just a few short steps:
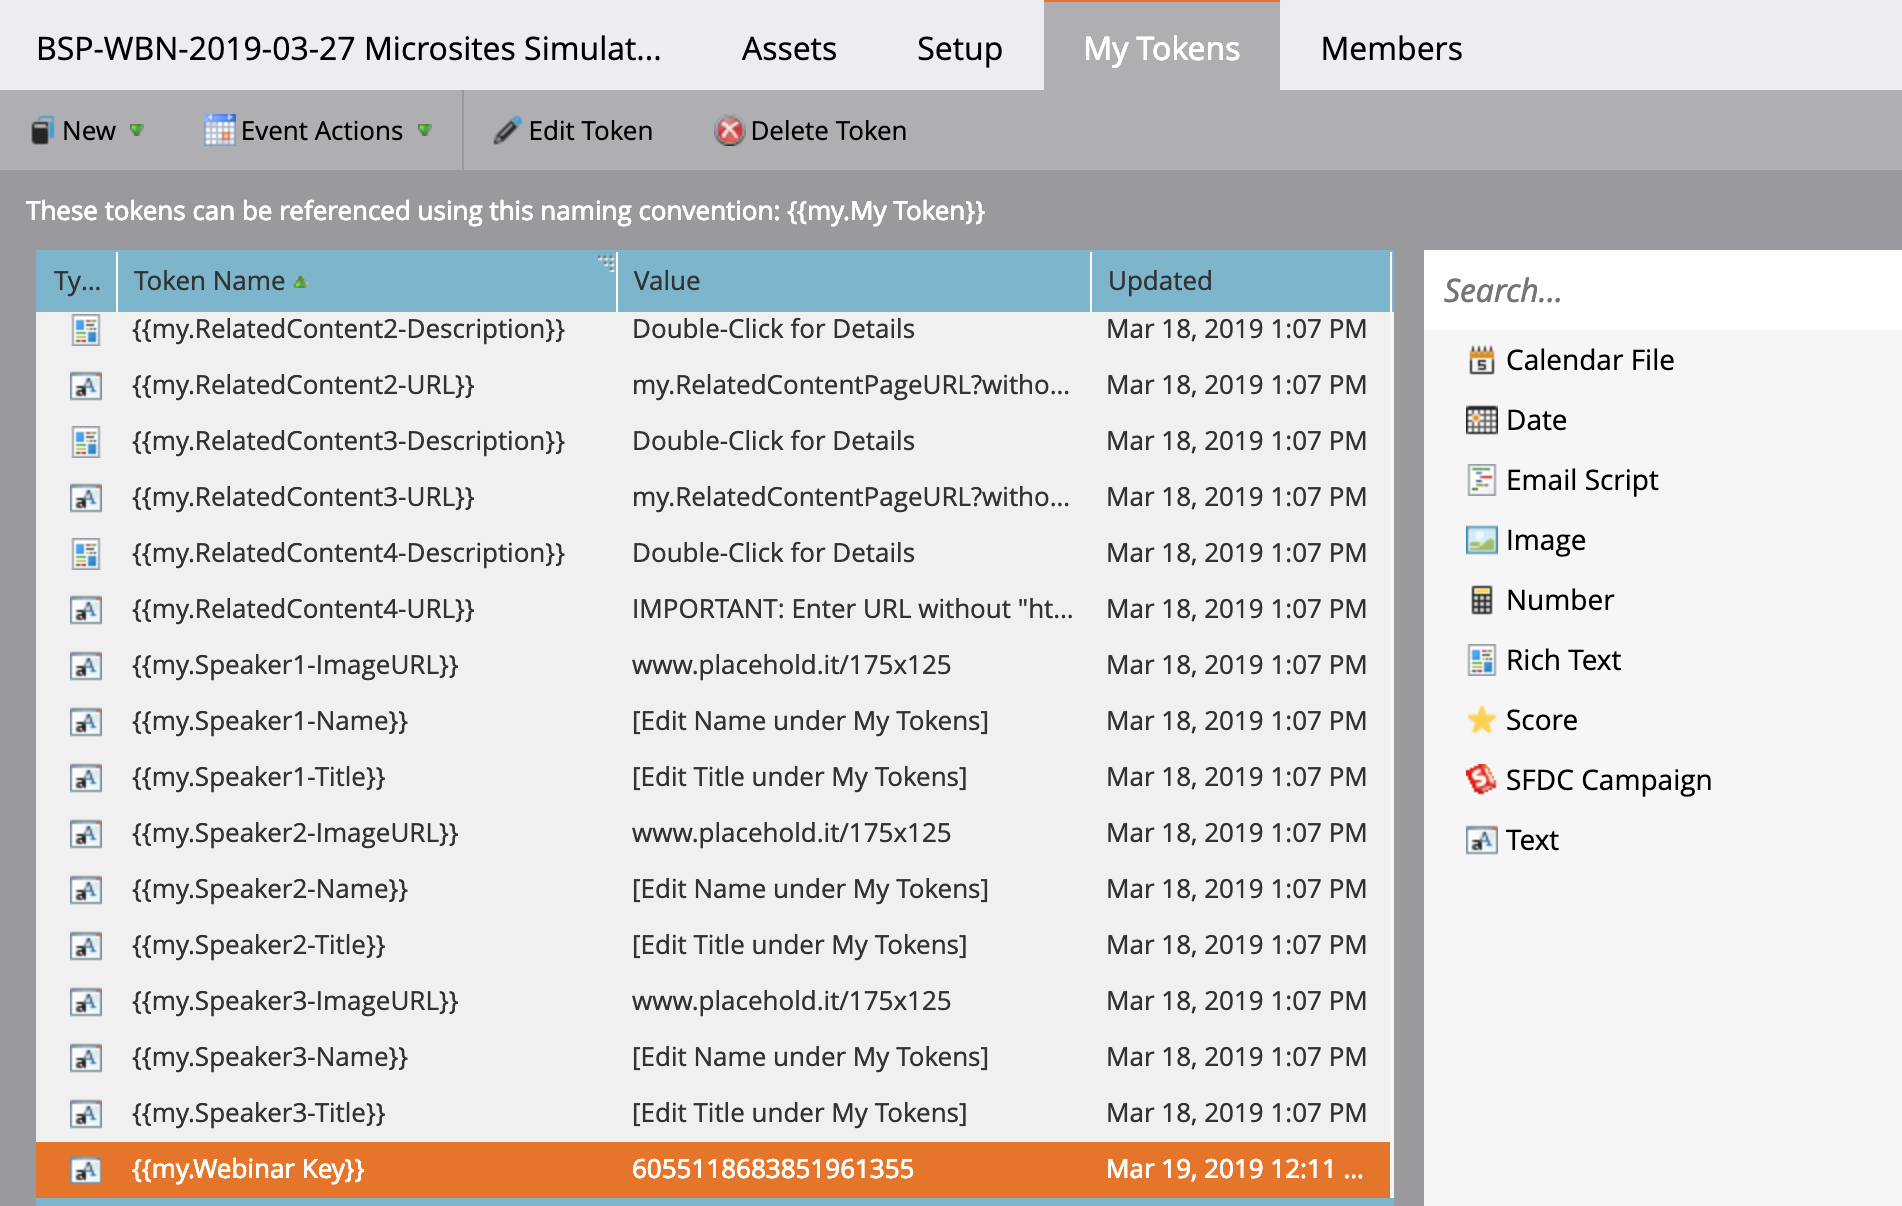
1. In your Marketo webinar program, click on the My Tokens tab, and drag over the text token called Webinar Key. From GoToWebinar, copy the webinar ID into the Value box. Click Save.
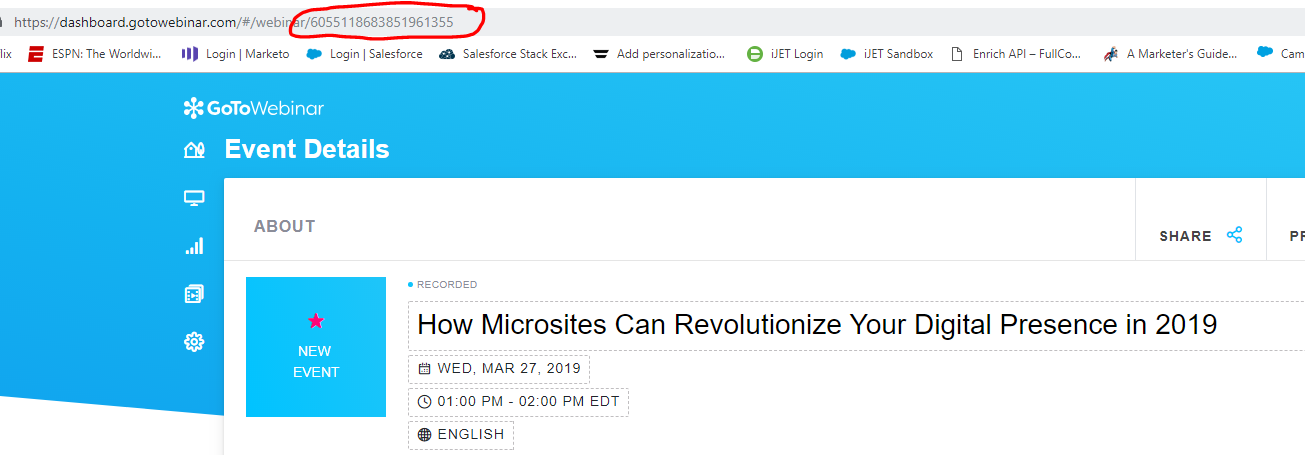
Note: You can get the webinar ID from the event URL when you’re logged into GoToWebinar:
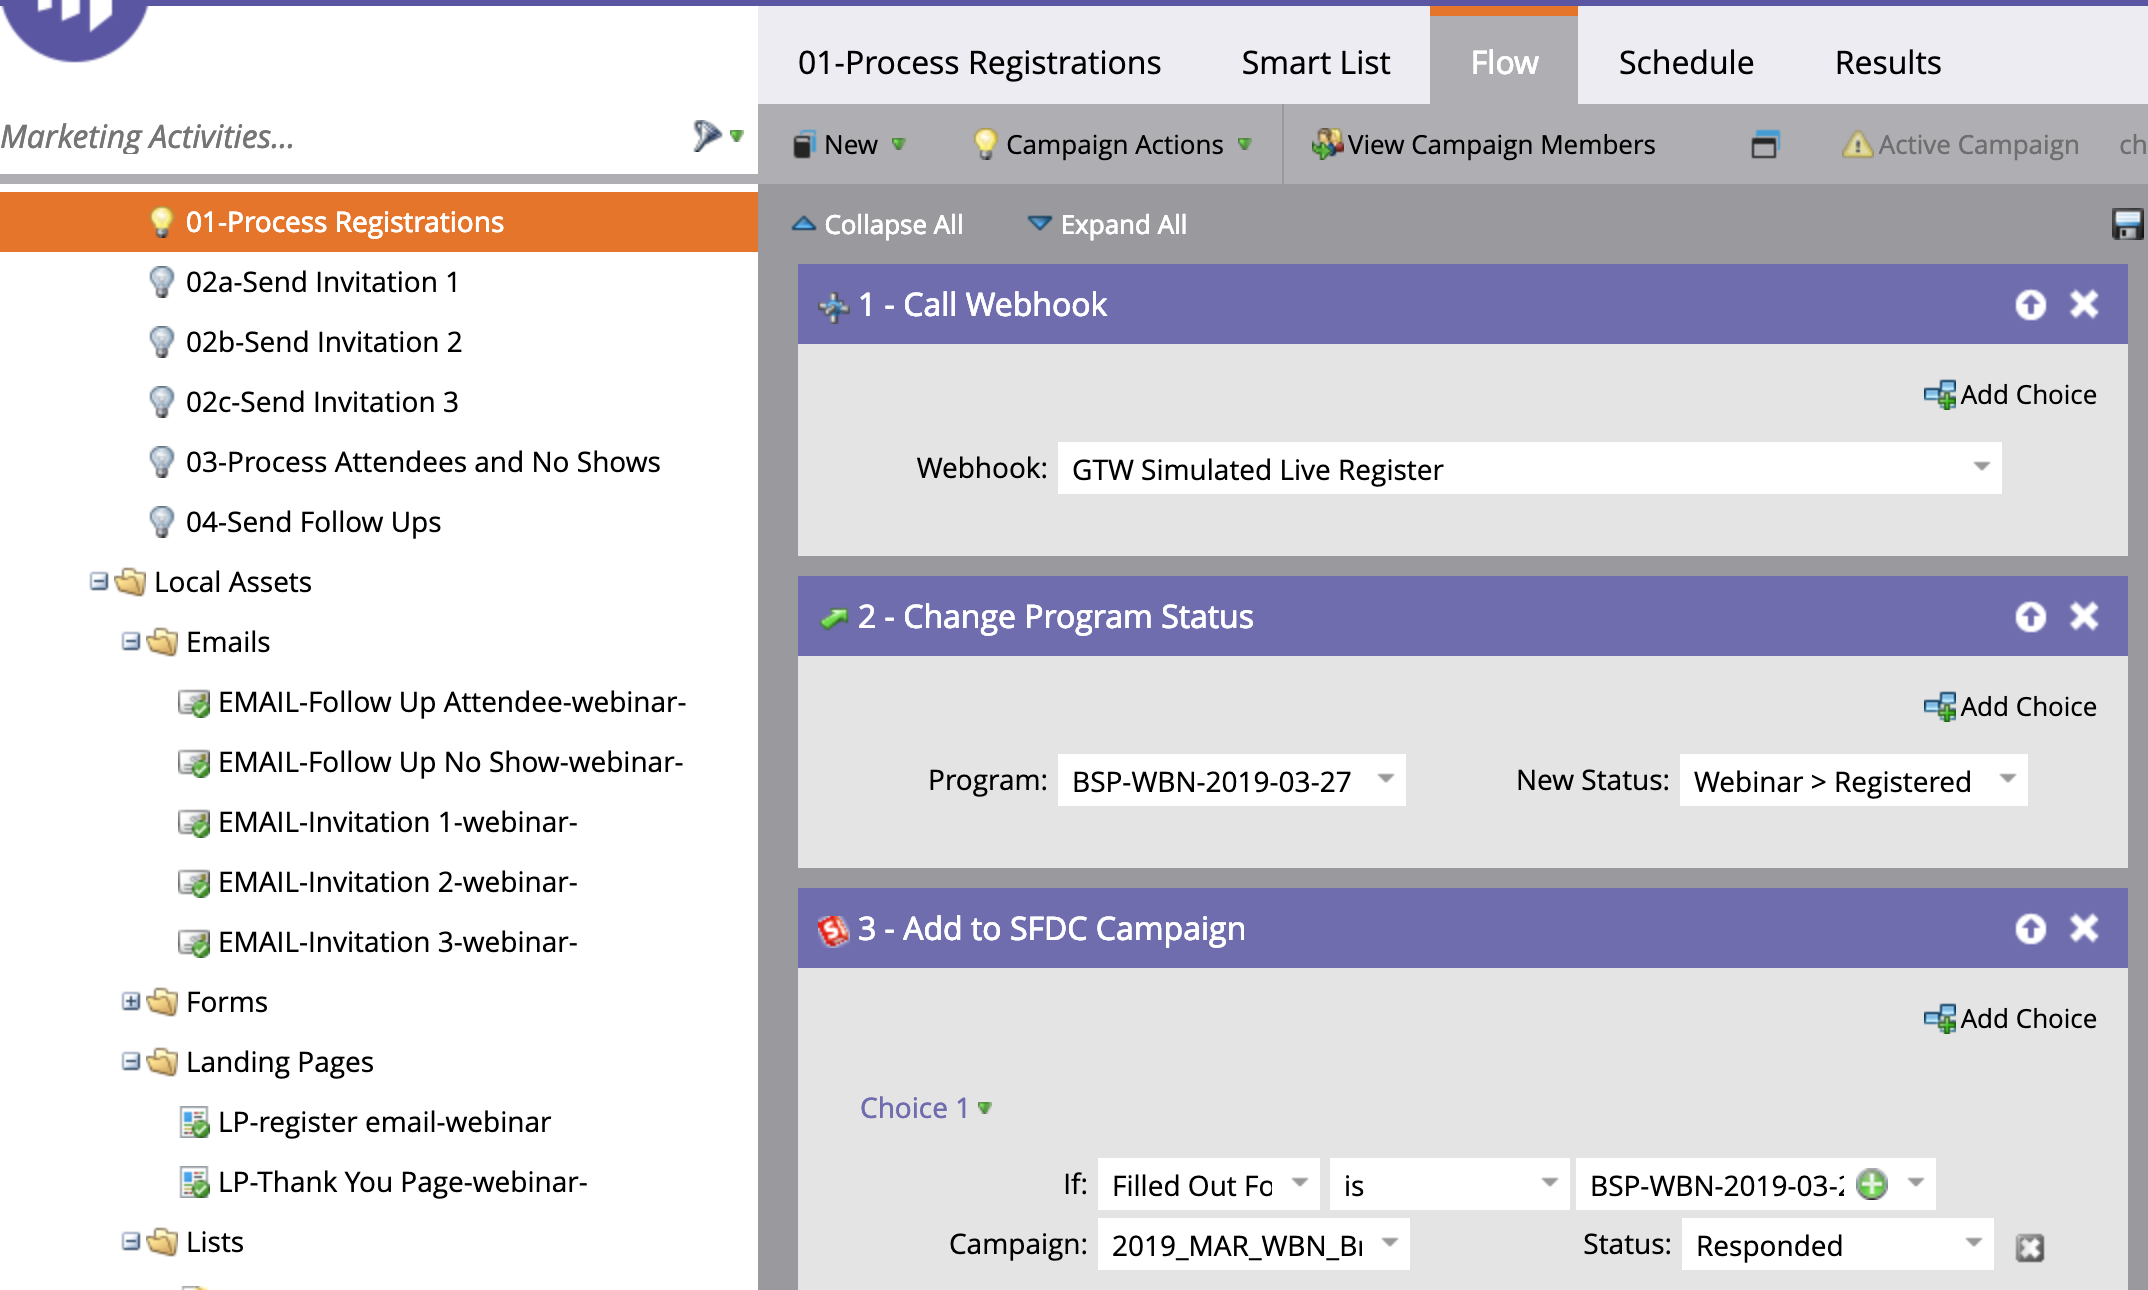
2. To process new registrations, you’ll use a smart campaign just like you normally would. Your smart list should be a Fills Out Form trigger.

3. In the flow, add a flow step Call Webhook, and select GTW Simulated Live Register from the dropdown. You can also add a flow step to Change Program Status to Webinar > Registered since this doesn’t happen automatically for Simulated Live events. Depending on whether you sync to SFDC Campaigns at the program level or not, you may also want to add a flow step to Add to SFDC Campaign with Status = Responded as well.
And that’s it! Go ahead and test on the landing page to make sure you receive the confirmation email from GoToWebinar (you’ll need to make sure this is turned on) and that it tracks the registration. If everything looks good, you’re ready to start promoting your Simulated Live webinar in Marketo.
Again, you’ll still need to manually import attendees/no shows back into Marketo after the “live” event, but at least this takes care of the registrations. Happy marketing!

