Salesforce Lead assignment rules are a powerful tool to make sure that Leads are assigned to the appropriate user or queue for follow up. They also allow marketers to get and stay out of the business of trying to maintain sales territory logic within their Marketing Automation Platform (MAP).
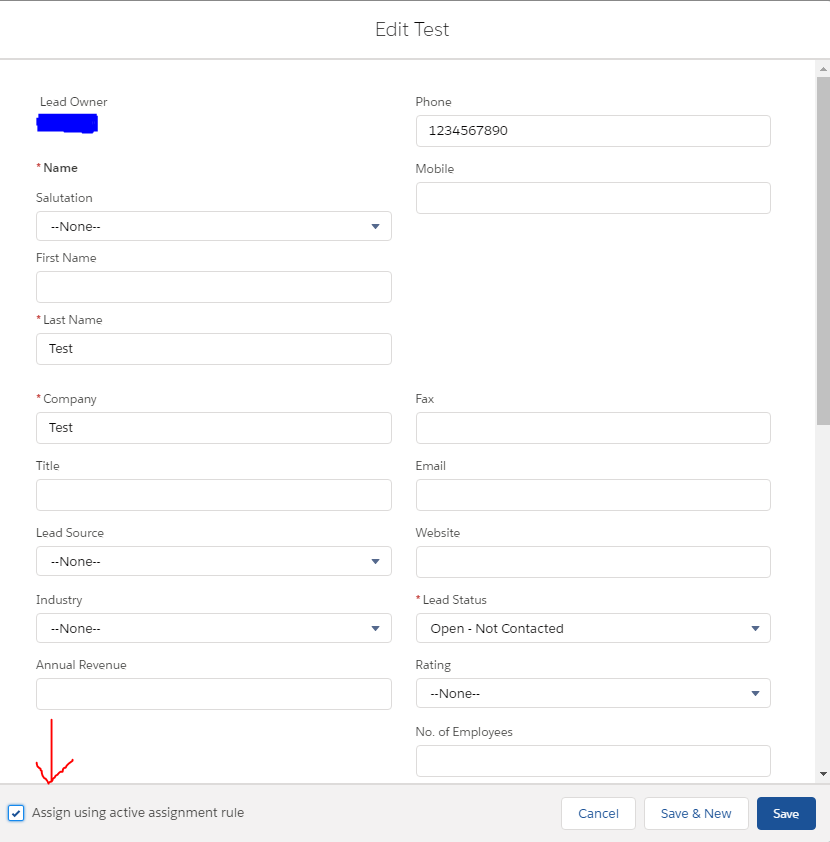
When a new Lead is created, Salesforce will use the logic you’ve configured to assign the record to the appropriate user or queue. But what if you need to re-run that logic on existing records? If you only need to do this for a single Lead record, the solution is as simple as editing the record and selecting the optional “Assign using active assignment rule” checkbox.
Note: On Sep 23, 2021, Salesforce announced they’re deprecating Process Builder in “Summer 2022.” And they cautioned, “the best way for you to future-proof your organization is to move your automation to Flow.” This Process Builder tutorial is still accurate, but we recommend reading and following the Flow tutorial instead.
>> Related: 6 Ways to Handle Those Pesky Spambot Clicks in Marketo <<
In this post:
What it looks like
Here’s an example of what that looks like:
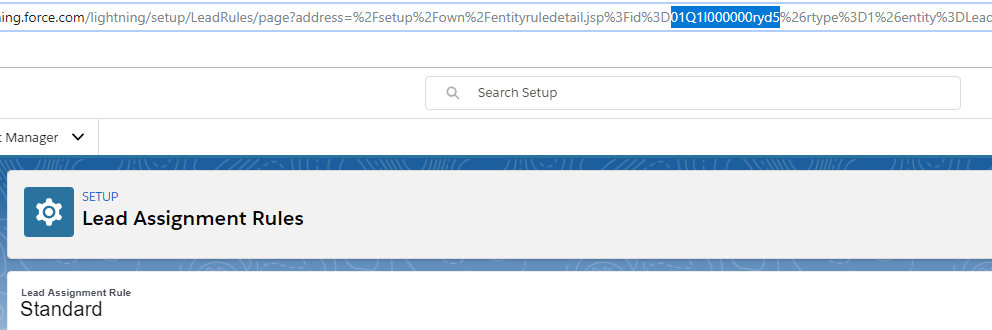
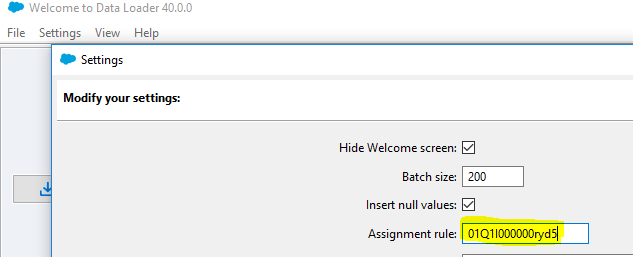
If you need to do a one-time batch reassignment of a number of records, you can export the relevant Lead Ids and use the Apex Data Loader to trigger assignment rules to fire. You can grab the ID of the appropriate Lead Assignment Rule from the URL bar when viewing the rule in Setup. It will always start with the prefix “01Q”.
Re-Run Salesforce Lead Assignments
There are times where you want to re-run assignment rules automatically under certain conditions. For example, you may assign Leads under a certain Lead Score to a Queue. When the Lead Score increases over the threshold, you then want to re-run assignment rules to assign to an inside sales rep for follow up.
In order to accomplish this, we can use the extremely powerful combination of Process Builder and an Apex Invocable method. This allows you to take advantage of the power of Apex with the flexibility to declaratively (clicks, not code!) control the logic of when to re-run the assignment rules without having to edit any code.
Using Apex for Salesforce Lead Assignment Rules
Let’s start with the code. Since we’re writing code here, we’ll need to start in a sandbox org first before deploying to production. You’re smart and already knew that you’d NEVER make changes in production without first testing in a sandbox (right?!), but in this case, Salesforce doesn’t trust you either way and forces you to write your code in a sandbox org before moving to production.
We’ll be creating an Apex class with a single method with the @InvocableMethod annotation, which allows us to call our Apex from within a Visual Flow or Process. The method accepts a single parameter—a list of Lead Ids—which you pass into it from your process.
public class RunAssignmentRules {

    @InvocableMethod
    public static void assignLeads(List<Id> leadIds){
        Database.DMLOptions dmo = new Database.DMLOptions();
        dmo.AssignmentRuleHeader.useDefaultRule = TRUE;
        List<Lead> toAssign = [SELECT Id FROM Lead WHERE Id = :leadIds];
        Database.update(toAssign,dmo);
    }

}
That’s it. Just those four lines are all you need in your code. The rest of your logic for when to actually fire the assignment rules will be configured in Process Builder.
Now, in order to actually deploy this to your production org, you’ll also need to create a test class to cover your code and ensure that it functions as expected in your environment. A sample test class might look like this, but this is extremely basic. I suggest working with a developer to make sure you’re doing everything properly and accounting for any additional requirements specific to your Salesforce instance.
@isTest
public class RunAssignmentRules_Test {

    @testSetup
    static void loadData(){
        Lead l = new Lead(
            LastName='Test',
            Company='Test'
        );
        insert l;
    }

    @isTest
    static void testLead(){
        //instantiate List to pass to @InvocableMethod
        List<Id> ids = new List<Id>();

        //query for test data and add to List
        Lead l = [SELECT Id, OwnerId FROM Lead];
        ids.add(l.Id);

        //call @InvocableMethod
        test.startTest();
        RunAssignmentRules.assignLeads(ids);
        test.stopTest();

        //verify that Lead was re-assigned
        Lead res = [SELECT Id, OwnerId FROM Lead];
        System.assert(l.OwnerId != res.OwnerId, res);
    }
}
Using Salesforce Process Builder for Salesforce Lead Assignment Rules
Now that we have our code to reassign our Leads, we’ll create our declarative logic of when to fire it using the Process Builder.
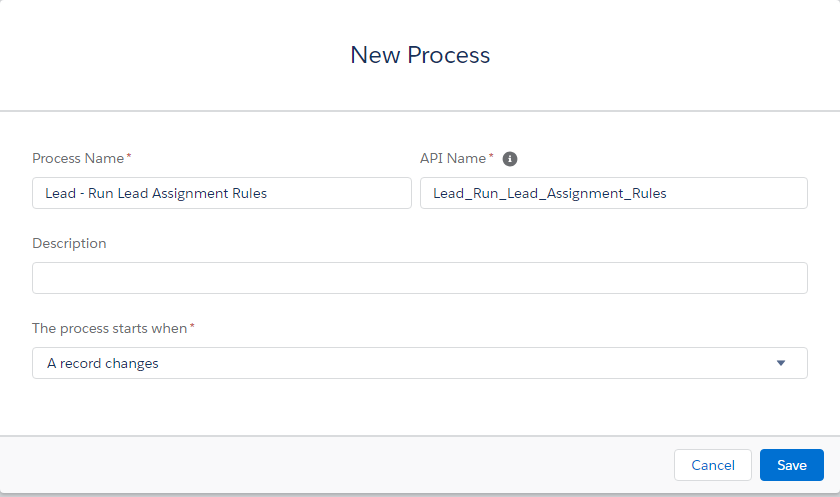
1) Create a new Process by searching for the Process Builder under Setup and clicking the New button in the top right. Give your process a name, and set the option for “The process starts when” to “A record changes” as shown in the screenshot below.
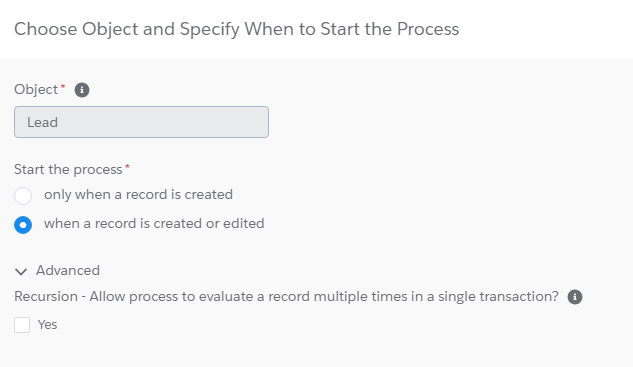
2) Select the Lead object for your process and start it whenever a record is created or edited.
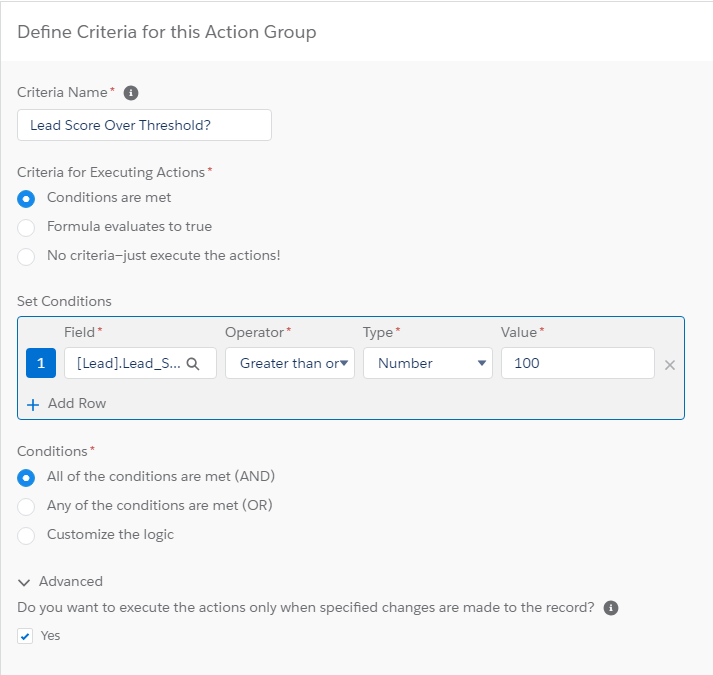
3) Click on Add Criteria, and give your criteria a name. In this example, we’ll be exploring the earlier use-case of wanting to re-assign Leads after they meet a certain Lead Score. We’ll select “conditions are met” and set the condition that the Lead Score is greater than or equal to 100. In the advanced section, select the option to execute actions only when specified changes are made. This ensures actions run only if the record previously didn’t meet the criteria but does after the update.
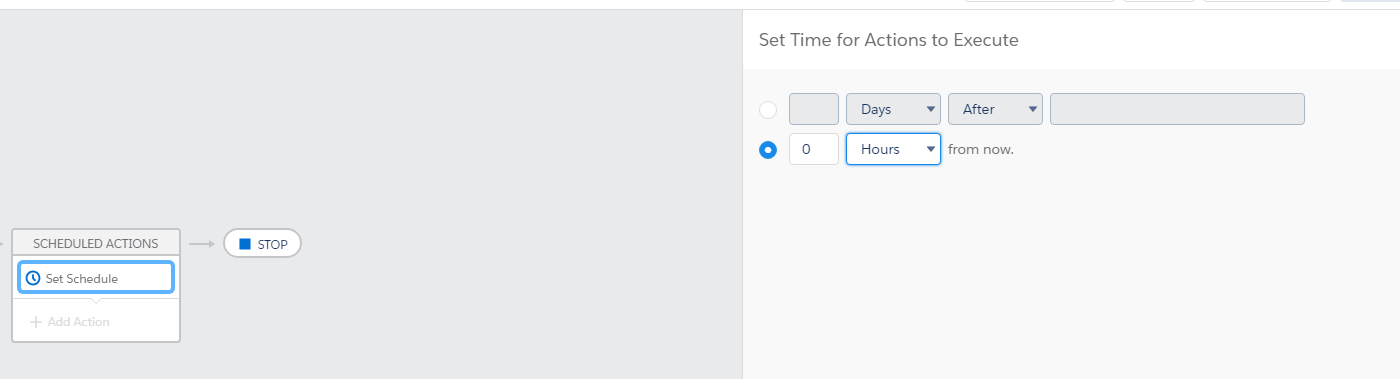
4) Without getting into too much detail, because of Triggers and Order of Execution, we can’t call our code in an immediate action. Instead, we’ll create a scheduled action to call our Apex method. In this case, we want the logic to execute as quickly as possible, so we’ll set the schedule for 0 hours from now.
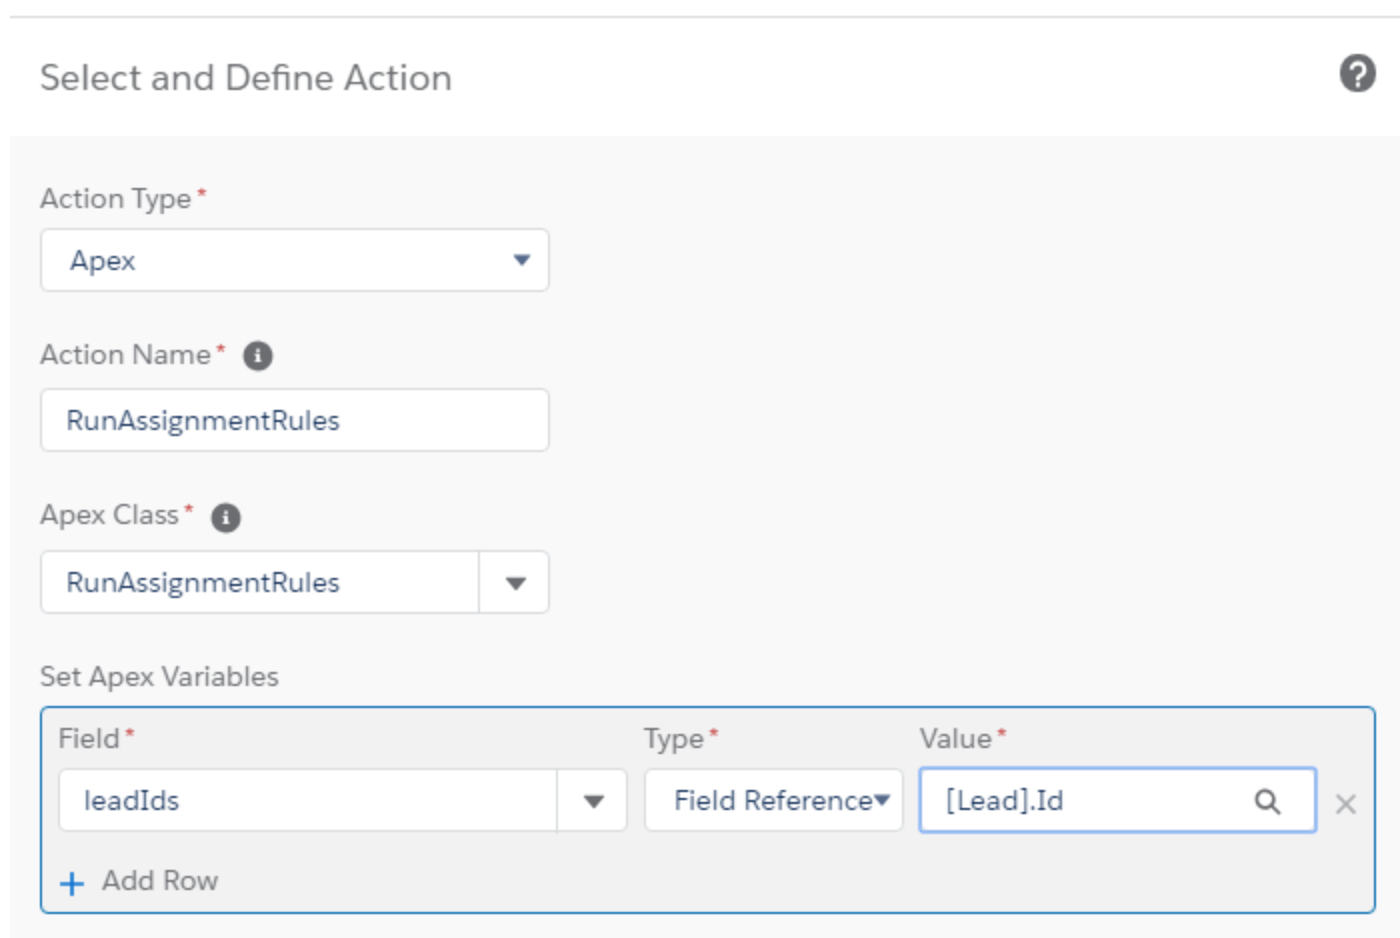
5) Once saved, we can create our scheduled action. Click Add Action, and select the Action Type Apex. Give your action a name, and select the Apex class you created earlier. Set the Apex Variables leadIds using the Field Reference of the Lead Id that started the process.

6) After saving, you can activate your process and test in your sandbox to ensure functionality before deploying to your production org. Because the code runs as a scheduled action, the reassignment occurs with a slight delay. In my experience, this is usually less than two minutes, but you can monitor this under Setup > Flows and viewing the Paused and Waiting Interviews section.

After testing and confirming everything works properly, deploy this to your production org and start using it immediately. The nice part about this particular approach is that if your requirements change””for example if your Lead Score threshold changes to 150 instead of 100″”you can change the logic in your Process without having to touch any code.